I decided to make Red Velvet Whoopie Pies with marshmallow creme filling for my office’s Valentine’s Day potluck. One word will describe them: Whoopie! These are delicious! I will definitely bake them again!! I loved the hint of marshmallow in the filling and the color of the cookies. They were super easy, just a little time-consuming since you bake the cookies, let them cool and then add the filling – but don’t let the time hinder your decision to make ’em. You won’t be disappointed!
I found this particular Red Velvet Whoppie Pie recipe a few weeks ago on Tasty Kitchen my recipe go-to site. I guess it’s really more of my look through every day and save the recipes I know I want to try site! I love that other people can rate the recipes and leave comments – that way I can see if they have any tips before I bake a recipe. I can also see if the recipe is ranked high or low which is usually a contributing factor in my decision to try it.
Disclaimer: I pretty much followed the recipe. I only made a few Katie type changes. Shhhh don’t tell Jon! He hates it when I don’t follow recipes to a T. You can read the exact recipe here. This recipe made 48 cookies (you could probably get 50 if needed) which means 24 sandwiches. Plenty for what I need for my office and a few for Jon & I to enjoy tonight!
One of my changes was adding a few drops of red food coloring. When you start adding the wet ingredients to the dry, store-bought cake mix you will notice the red beads start forming as there is already food coloring in the dry cake mix. However, the picture of baked cake on the box of the cake mix did not meet my standards of ‘red’ velvet. You know I like a little lot of color!
Here is a picture of the batter once everything was added. The picture is to show the thickness…notice that the batter is staying on the spatula, unlike when you make a standard cake mix. This is a thick almost cookie-like batter (which is a good thing when you are making cookies out of it!)
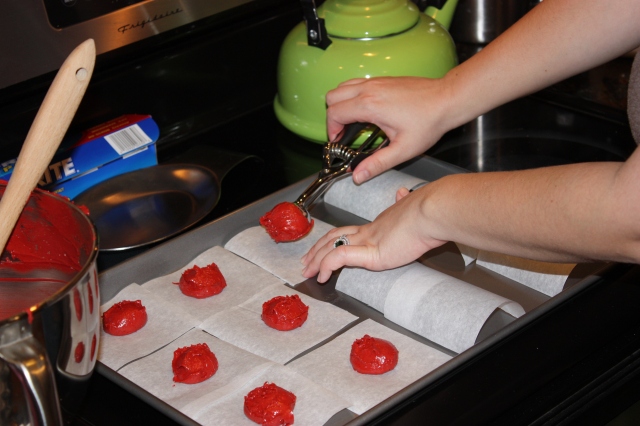
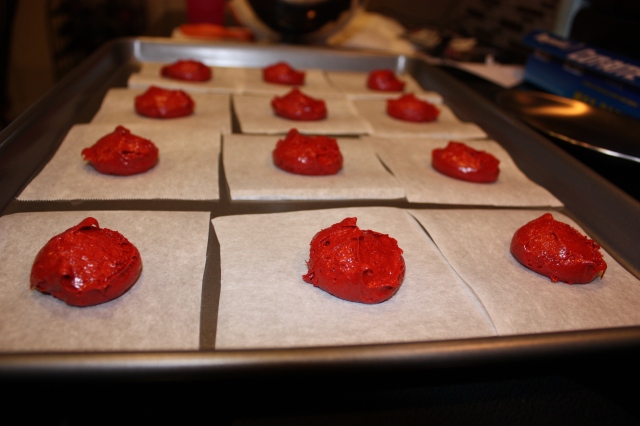
I used a trick I learned from making Pumpkin Creme Pies this fall(also very yummy!!! definitely a crowd pleaser!): Cut parchment paper into cookie-sized squares so that once the cookies are baked you can easily (very easily!) grab the cookies off the cookie sheet and peel (very easily!) the parchment paper off. I also used a cookie scoop so that all the cookies would be uniform in size. Very important when making cookie sandwiches.
Look at that dough! I love the vibrant red color
This is what they looked liked out of the oven. They are still a very pretty red. One of the other changes I made was in terms of cooking time. The recipe states to bake them for 13 minutes. Well, at 13 minutes I did the toothpick cake test and the cookies were still wet in the middle. I ended up cooking each batch for 15 minutes. At 15 minutes the cookies are still a little chewy in the middle but crisper around the edges. Next time I would probably just bake them for the 13 minutes as Jon & I like a chewier cookie. I think you don’t have to worry about the wetness as they cookies will set a little as they are cooling (just like all cookies!).
I got a little lazy (and ran out of parchment paper) so I used some wax paper and decided to see what would happen if I didn’t cut it into the squares. Verdict: the squares make it a little easier to lift and peel; however, one large sheet of wax paper still did they job. Just lift then peel.
For the filling I used another trick I learned from the Pumpkin Creme Pies. This is a huge time and mess saver! I put the marshmallow filling into a gallon-sized ziplock bag, let the extra air out and closed the bag, then cut a small hole in one of the corners.
This becomes a cheap, home-made pastry bag. It really makes it easy to put the creme on the cookies. I always try to the put the filling on one side of all the cookies prior to making any sandwiches. This way I can go back and easily add creme if there is a lot left over as the first batch tends to have less creme then the second when I make them.
Finished product: Red Velvet Whoopie Pies! YUM!!! I also recycled the wax paper used to bake the cookies and used it again to separate the layers of whoopie pies in my container.
Packed and ready to bring in to my office! YUMMY!!!


Great minds think alike!
I know, right?! Yours looked scrumptious too!